
Lighting Masterclass: Building A Scene

Sponsored by ROSCO, SIGMA CINE, Camera Ambassador
This class is modeled on the Cinematography Challenge, Presented by SIGMA CINE and ROSCO - see more here
Cinematographer: Jessica Tolliver
Gaffer: Jon Benson
model: Vincent Singleton
Camera: RED Komodo 4K
Lenses: SIGMA High Speed CINE Lenses
Lighting Fixtures: DMG Lumiere by ROSCO
For this class, Jessica and Jon were presented with a small snippet of script, about a half page of text, just enough to establish a narrative and a mood. The protagonist is sorting through boxes of memories, and lighting and lensing was a key tool in communicating tone in a sparsely designed space, without the advantage of dialog. “I wanted a warm, yet dark nostalgic feel,” says Jessica, “I wanted the space to feel cluttered, as we often feel sometimes when we have to sort through our own emotions on things that happened long ago. I decided to go with the SIGMA 24mm lens for my master shot, which I felt was the sweet spot for the small space I was in. and punched in for a close-up with the 50mm lens.”
Below you can see a quick overhead for the lighting setup - there are two shots in the clip, but the light fixtures and positions didn’t change between them. “This is a 5 light setup…Starting with the key light we have a DMG MAXI MIX® with a SNAPBAG® keying our subject from camera right. For the Fill, we have a DMG MINI MIX® low on a baby c-stand bouncing into a 4x4 beadboard To illuminate what's outside of the window, we have another MAXI MIX® just outside of it turned vertically. For the hair light, we have a MINI MIX just outside of frame right above the subject. And finally we have a practical on a dimmer.”

Working in a tight space, just a two-wall set, the different form factors of the ROSCO fixtures were a huge advantage. The larger MAXI MIX® fixtures off camera right allowed for a soft, even source, while the MINI MIX® was more easily able to be used in the limited space available on set - whether rigged off the back wall or on small stand just below the frame for fill. “Not only that, being able to have these lights correspond to the actual ROSCO gels, makes mixing several of these lights with other gelled light fixtures a seamless process!”
With such a limited crew, the time-saving features of the equipment were extremely useful. “I love the metadata feature of the SIGMA CINE lenses. Since I didn't have a 1st AC on set with me, having the lens data shown on my monitor was huge for me…As for the lighting, I'm a huge fan of toggling the color temperature until it feels "right" or matches the emotion I'm going for. I love that I was able to hop on all of the ROSCO fixtures and explore 3 different modes, (White mode, gel mode, and color mode) and really dial in exactly what I wanted. The possibilities were endless."
Watch the clip and see below for a step by step of each layer of lighting that went into building the final image!

Fig 1 - Lights Off
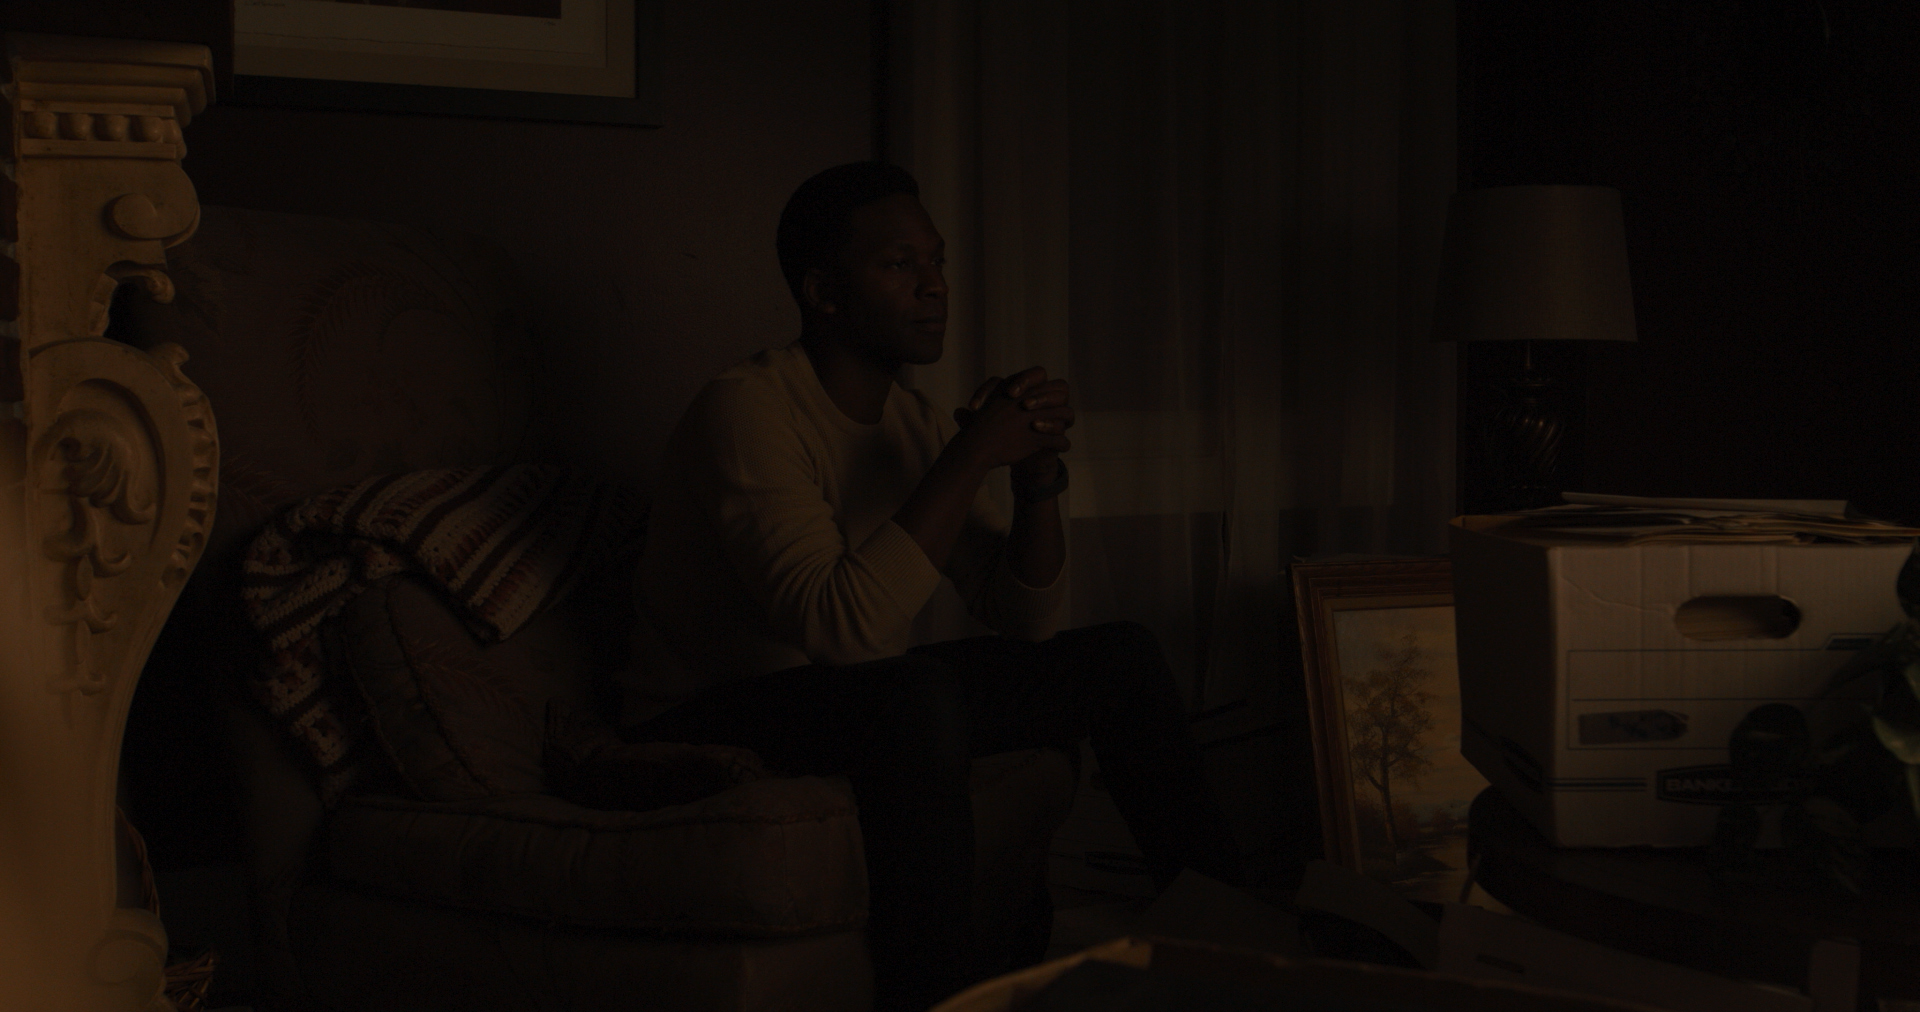
Fig 2 - Fill Light Only (DMG MINI MIX®)

Fig 3 - Hairlight Only (DMG MINI MIX® w/ SNAPBAG® + SNAPGRID®)

Fig 4 - Practical Only (bulb on dimmer)

Fig 5 - Window Light Only (DMG MAXI MIX®)

Fig 6 - Key Only (DMG MAXI MIX® w/ SNAPBAG®)

Fig 7 - Key + Fill

Fig 8 - Key + Fill + Practical
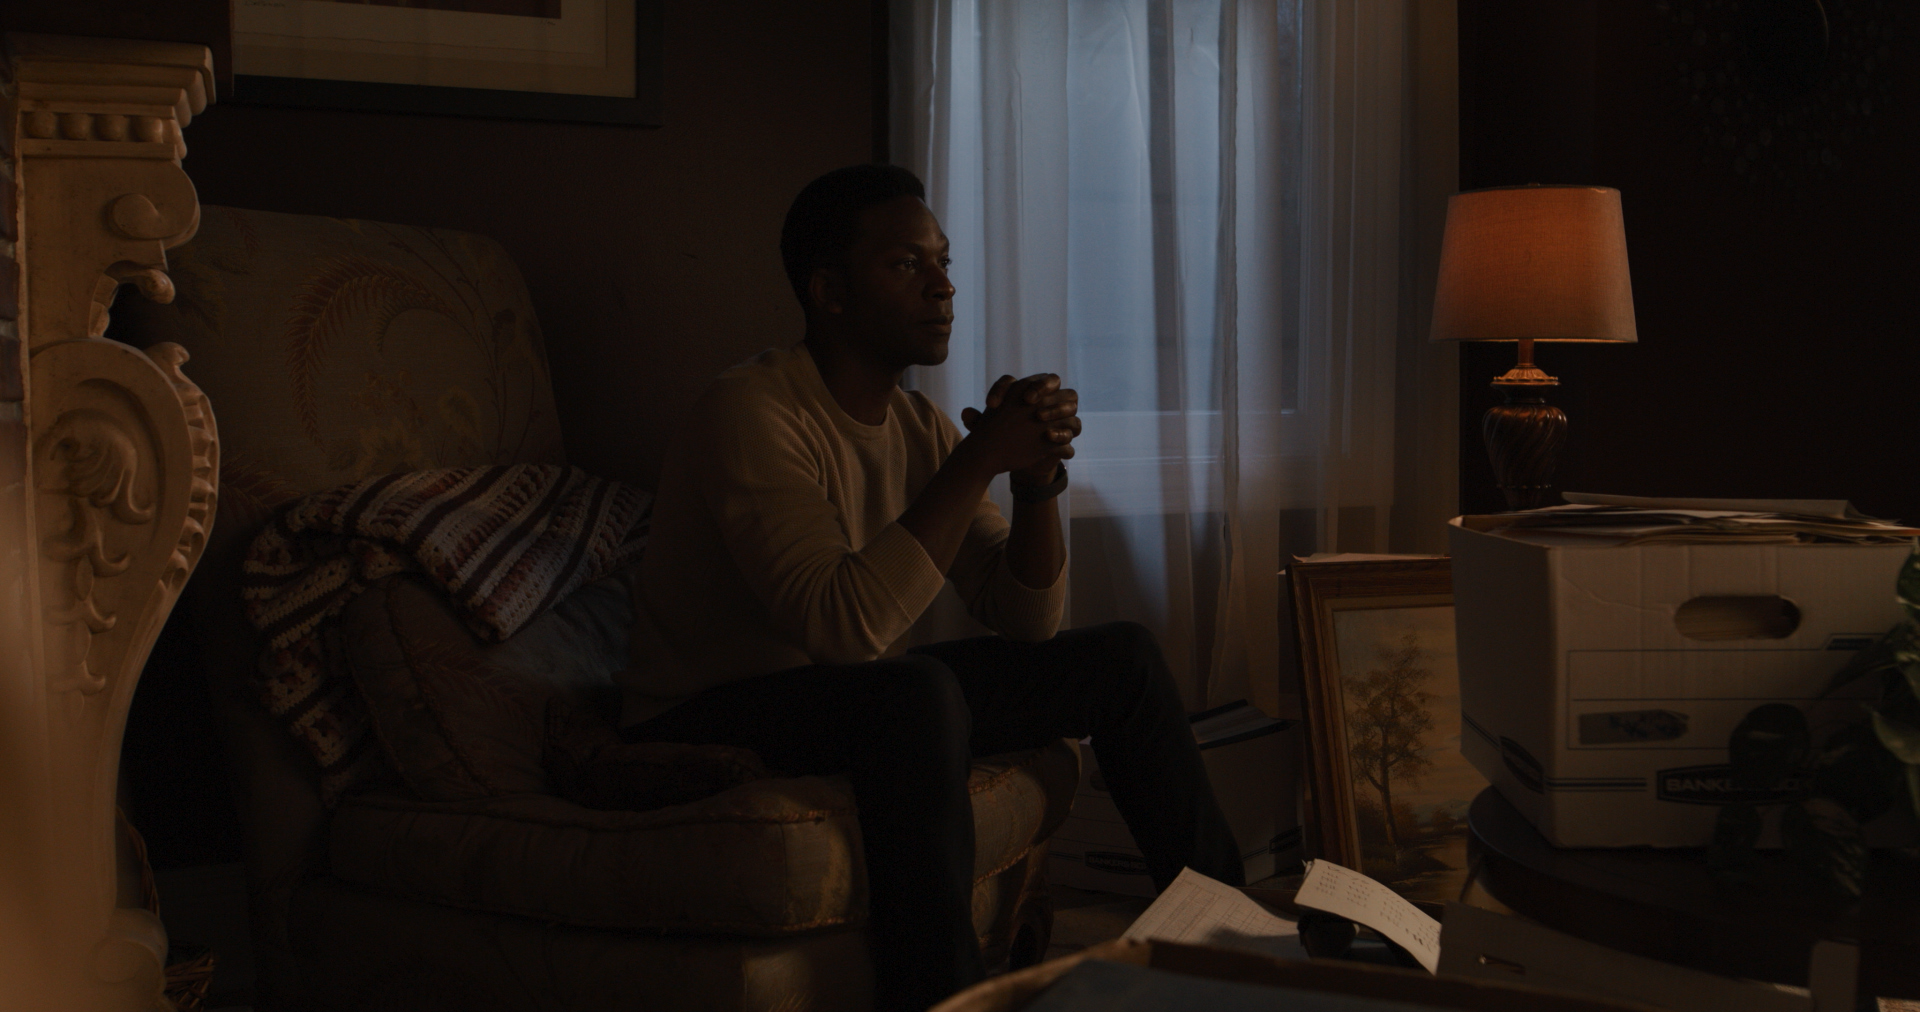
Fig 9 - Key + Fill + Practical + Window

Fig 10 - Key + Fill + Practical + Window + Hairlight (Final Image)